How Does Pipe Relining Work?
See how CCTV, cleaning, liner installation, curing, and final camera checks fit together when a damaged line is repaired with pipe relining.
Short answer
Pipe relining works by inspecting the line on CCTV, cleaning and preparing the pipe, installing a liner inside the existing run, curing it in place, and checking the finished line on camera before handover.
P24 Pipe Relining Sydney
6 min read
Key Takeaways
- Pipe relining starts with CCTV, not guesswork
- Cleaning and preparation matter as much as the liner itself
- Final camera checks confirm the finished repair before handover
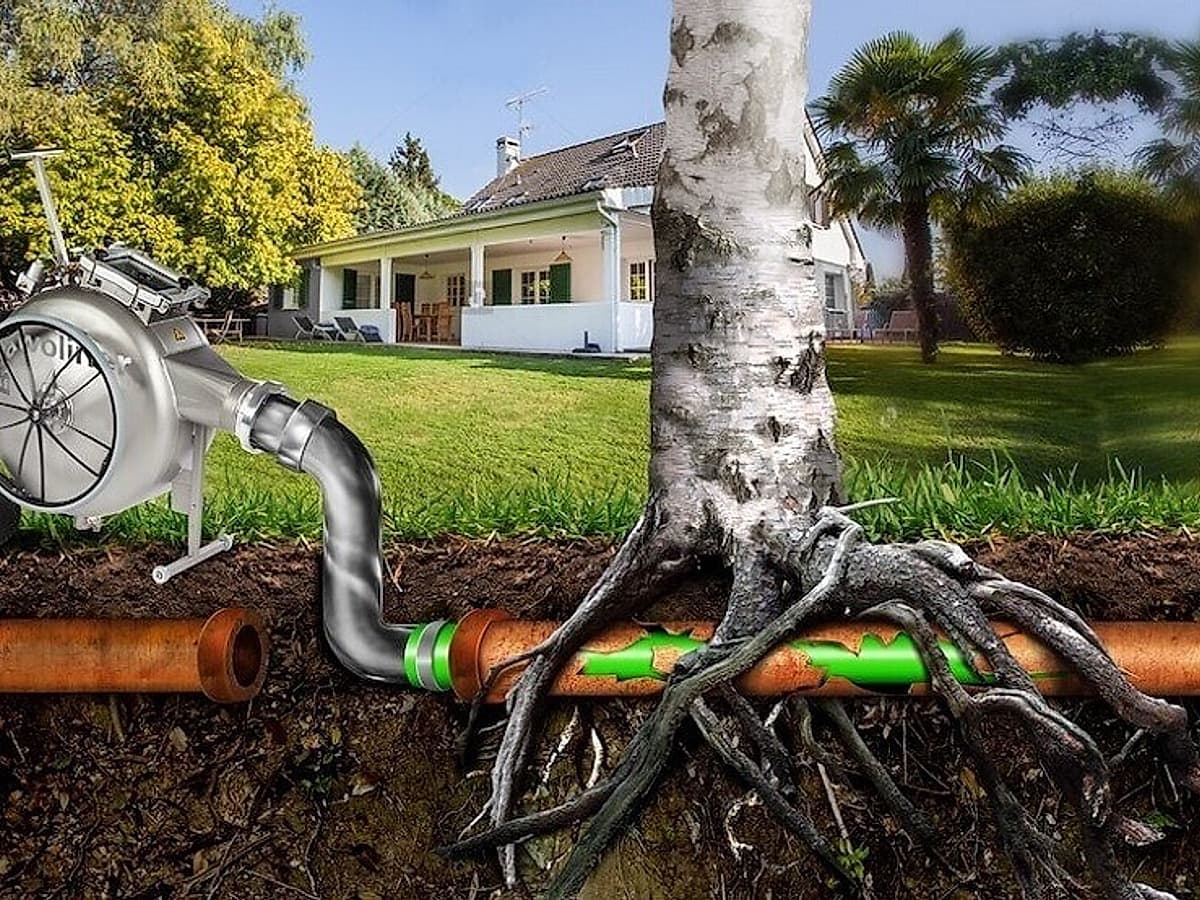
How does pipe relining work? In 2026, the short answer is this: the line is inspected on CCTV, cleaned and prepared, lined from within, cured in place, and checked again before handover. The method works because it repairs the damaged section from inside the host pipe rather than digging along the whole run.
The key point is that pipe relining is not just one installation step. It is a sequence. If the inspection is weak or the preparation is rushed, the repair decision becomes less reliable. That is why the process starts with footage, not guesswork.
How Does Pipe Relining Work?
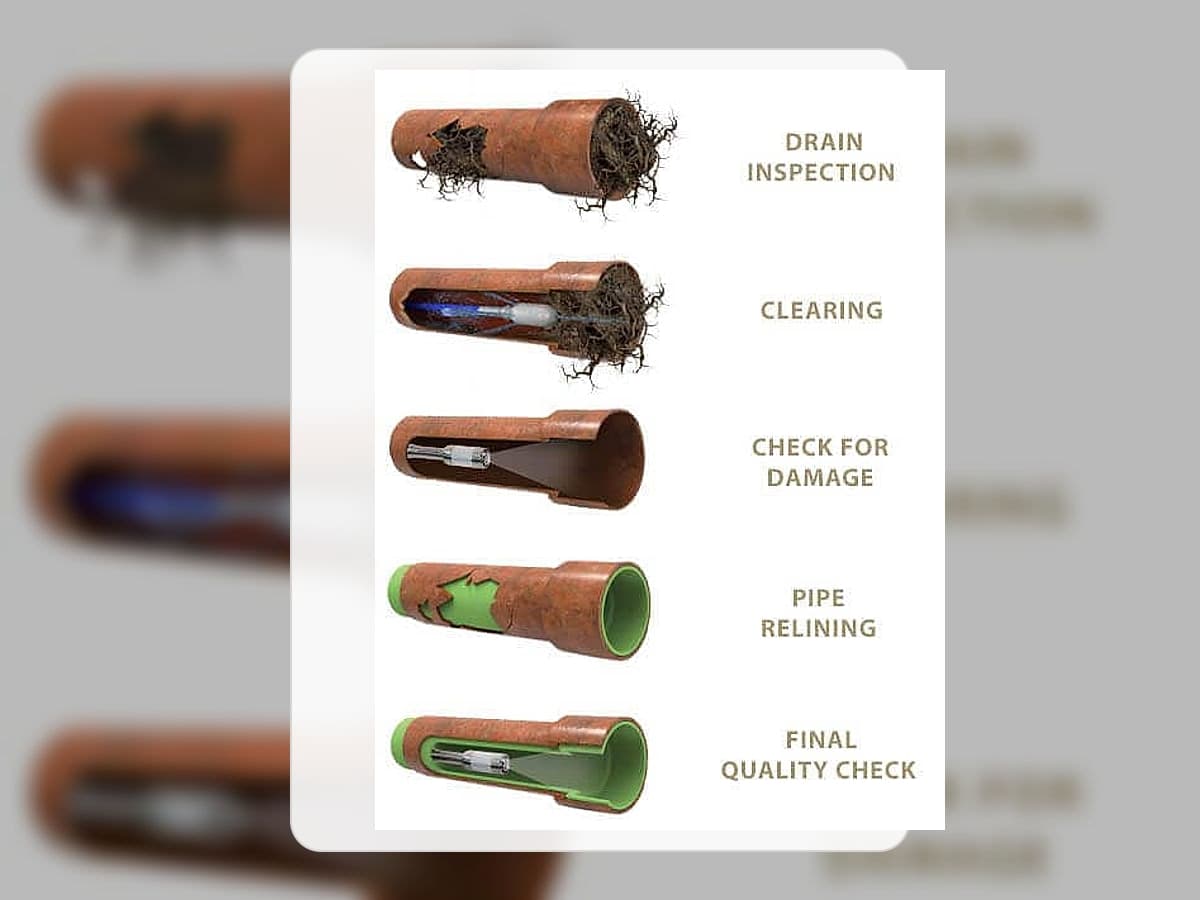
Pipe relining works by restoring a damaged pipe from within the existing line. The job usually moves through inspection, cleaning, liner installation, curing, and final verification, with each stage shaped by the actual condition of the pipe and the access available on site.
Step 1: Inspect The Line On CCTV
The first step is to inspect the pipe properly. A CCTV drain inspection shows:
- where the defect sits
- whether the line is blocked, cracked, root-affected, or worn
- how much of the run is involved
- whether the host pipe still looks suitable to reline
- what preparation is likely to be needed first
This is the stage that separates a relining candidate from a pipe that may need another repair path.
Step 2: Clean And Prepare The Pipe
Once the repair section has been identified, the line usually needs to be cleaned and prepared. That can include root removal, high-pressure cleaning, or other preparation needed to expose the host pipe clearly.
This step matters for two reasons. First, the pipe has to be clean enough for the liner stage to work properly. Second, the line often looks different after preparation than it did when it was still full of build-up or root mass.
That is why some jobs move through Drain Cleaning Sydney before anyone locks in the relining scope.
Step 3: Confirm The Repair Scope
Before installation, the scope has to be clear. This is where the process becomes practical rather than theoretical.
The key questions are:
- what exact section is being repaired?
- how is the line being accessed?
- are there bends or junctions that affect the setup?
- is the job residential, shared drainage, or a larger site?
- what footage or reporting will be handed over at the end?
This stage is also where the quote becomes more useful. A repair price is only worth trusting if it matches the inspected section and the preparation that has already been identified.
Step 4: Install The Liner
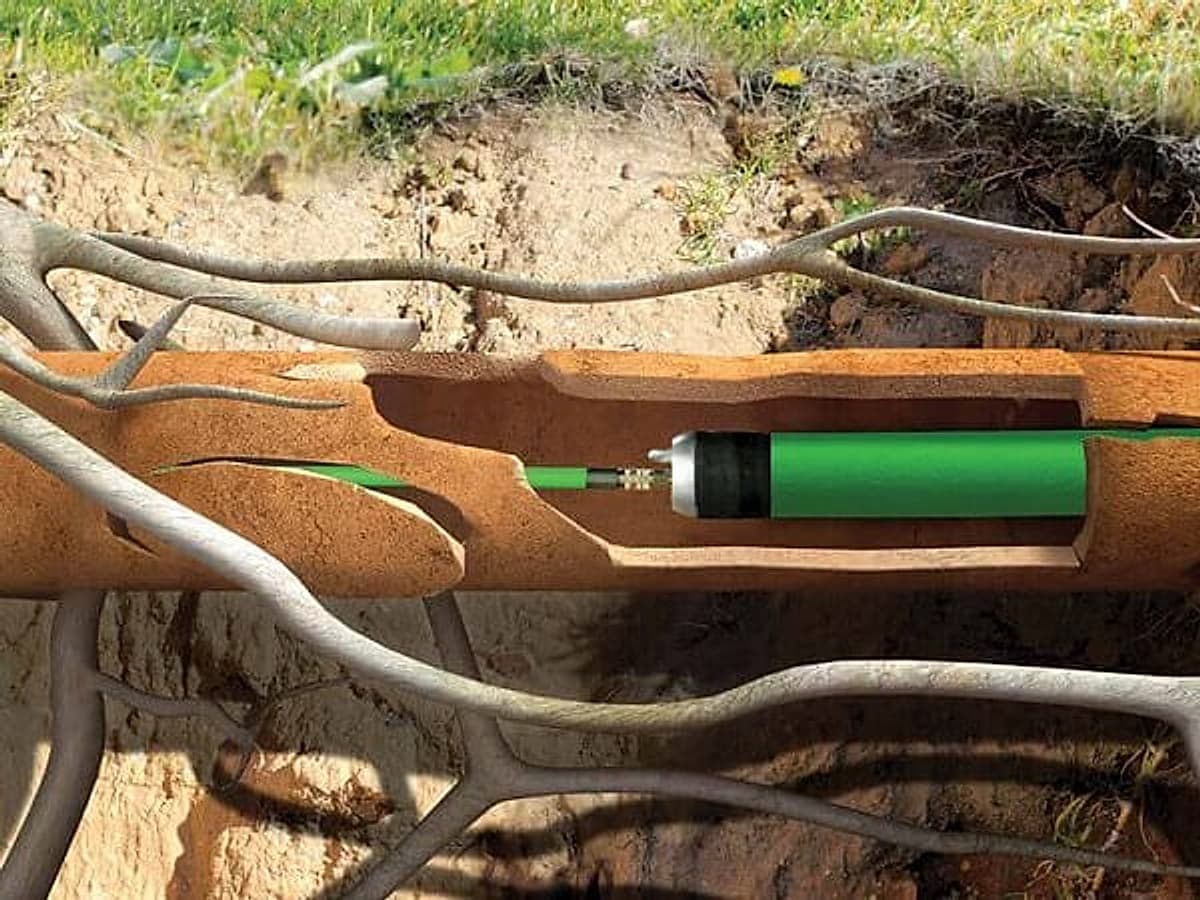
Once the section is ready, the liner is positioned inside the damaged run through the available access point. The exact method can vary with the job, but the purpose stays the same: place the liner accurately through the approved repair section so it can form the new inner wall of the pipe.
This is the part of the process most people picture first, but it only works well because the earlier steps have already clarified the scope.
Step 5: Cure The Liner In Place
After positioning, the liner is cured so it sets into the final internal pipe. The curing method depends on the system and the job conditions, but the outcome is the same: the liner hardens in place and restores the damaged section from within.
This stage is not just about time on site. It is about control. The liner has to be cured in a way that suits the actual pipe and the installation plan.
Step 6: Re-check The Finished Line
Once the repair is complete, the line is checked again. Final verification matters because it closes the loop between:
- what the original footage showed
- what section was approved for repair
- what was installed
- what the finished line now looks like
That handover step is one of the clearest signs of a proper relining process. It helps the owner understand the work without relying on a verbal summary alone.
What Can Change The Pipe Relining Process?
Not every job moves through the stages at the same pace. The process changes with the line.
Pipe condition
A lightly damaged section is different from a root-affected line that needs heavier preparation first.
Access
Some lines are simple to reach. Others sit under driveways, internal floors, landscaped areas, or shared access zones.
Job type
Residential jobs are often more direct. Shared drainage and active sites can involve broader CCTV scope, staged works, and more handover detail.
The fault itself
Some lines are suitable to reline once prepared. Others may prove unsuitable after inspection, which is exactly why the process starts with CCTV.
When The Process Stops Before Relining
This is an important part of the answer. Pipe relining does not always move all the way to installation.
Sometimes the inspection shows:
- the line only needs clearing or maintenance
- the host pipe still needs heavier preparation
- the damaged section is too compromised to line safely
- another repair path fits better
That does not mean the process failed. It means the inspection stage did its job. A good relining process includes the possibility that the right next step may not be relining.
What A Good Handover Usually Includes
If the repair goes ahead, the handover should help you understand the finished work clearly.
That may include:
- before and after footage
- confirmation of the section that was repaired
- notes tied to the repair scope
- warranty documentation linked to the approved work
This matters on residential jobs, and it matters even more when the line sits inside a strata, commercial, or shared drainage system.
How The Process Looks On Different Jobs
Residential properties
On a typical home, the process is often about confirming one damaged section, preparing the line properly, installing the liner, and handing over clear records without major surface disruption.
Sewer or stormwater sections
The process is similar, but the pipe function and site layout can change the preparation and access. If the fault sits specifically in the sewer or stormwater line, the scope may be framed more narrowly around that part of the drainage system.
Shared or active sites
On larger sites, the relining process often includes more planning around access, timing, and stakeholder handover before the work starts.
Questions To Ask Before The Process Starts
If you are reviewing a relining proposal, these are the useful questions:
- has the line been inspected on CCTV?
- has the pipe been cleaned enough to show the real condition?
- what exact section is being repaired?
- what access point will be used?
- what do I receive after the work is finished?
If those answers are still vague, the process probably needs more definition before the job is approved.
The Bottom Line
How does pipe relining work? It works by inspecting the line, preparing it properly, installing a liner inside the damaged section, curing that liner in place, and checking the finished result before handover.
The strongest thing about the process is not the liner alone. It is the sequence. If the line has already been confirmed as suitable, the next step is the main Pipe Relining Sydney service page. If the condition is still unclear, the process starts earlier, with footage and preparation rather than assumptions.
Next step
Need to confirm what the line is actually doing?
If the blockage keeps returning or the cause is still unclear, start with the footage and the condition of the line before anyone guesses at the repair path. The most relevant service after this guide is usually Pipe Relining Sydney.
Related services
Sydney coverage
Need a local pipe relining page after this guide?
Start with the Sydney locations hub if you want region and suburb guidance, then move into the area that matches the property.
Pipe Relining Sydney Locations
Start with the Sydney locations hub, then move into the right region.
Open pagePipe Relining Eastern Suburbs
Browse local pipe relining guidance for the Eastern Suburbs.
Open pagePipe Relining Inner West
See pipe relining coverage and project proof across the Inner West.
Open pagePipe Relining North Shore
Open the North Shore region page for local pipe relining guidance.
Open page
P24 Pipe Relining Sydney
Sydney's Pipe Relining Specialists
Sydney pipe relining and drain repair specialists using trenchless repair methods, clear repair planning, and written handover documentation.